- Know your camera. Read
the manual and try every function on the camera. Know what every button
does. Know what every setting does. Know what every menu option does. You
can not advance or improve your photography without knowing how your primary
tool, your camera, operates.
- Know your camera and
lens combinations. If you are using a Single Lens Reflex camera that enables
the use of different lenses, you must understand what each camera/lens
combination is capable of creating. In particular, get a feel for the lowest
light levels you can work in using your fastest lens wide open and highest
usable ISO settings. Also, experiment to discover the slowest shutter speeds
you can use at your longest possible focal length.
- Know your flash. Read
your flash unit’s manual, or the flash section of your camera’s manual, and
try every function on the flash. Know what every button does. Know what
every setting does. Know what every menu option does. In particular, you
need to know how to alter your flash output down 1-3 stops for fill flash
purposes.
- Use the proper fully
automatic mode. Understand what your camera’s additional automatic operating
modes (portrait, landscape, night, etc.) modes do and what conditions they
are optimized for. Don’t be afraid or ashamed to use fully automatic mode.
The idea is to get the shot. Start with automatic mode to get the “record
shot,” then experiment with other automatic modes that you think would be
appropriate for the situation.
- Use the proper priority
mode. Understand fully what shutter priority and aperture priority modes do
and what shooting conditions and desired creative outcome are best for each
mode.
- Use fill flash. Soften
shadows and create a catch light (pinpoints of light in a subject’s eyes) by
using fill flash. This is mandatory for shooting in harsh sunlight.
- Use bounce flash.
Direct flash is harsh and will often wash out your subject. Use a dedicated
flash with a rotating head and bounce off a ceiling or a card.
- Use under exposure to
protect highlights. Digital cameras have limited dynamic range so it is easy
to overexpose highlights. Once they are gone, you cannot get them back.
Conversely, digital cameras can create files that have good resiliency for
underexposure. Bracket down a half and full stop to create some files that
will preserve your highlights.
- Understand panning.
Practice panning with your most likely camera/lens panning combination. This will
probably be your longest telephoto lens. Understand what the different
Vibration Reduction (VR) or Image Stabilization (IS) settings are for on the
lenses you own and how they affect panning. Determine what different shutter
speeds produce at different panning rates.
- Adjust your subjects to
the available light conditions. Leverage the “golden hour” moments of
sunrise and sunset for spectacular large scale scenery and settings. Use
those same moments for subjects you can schedule and control. In the harsh
light of a sunny mid day, wait for a cloud, shoot in the shadows or
concentrate on macro photography. On cloudy or rainy days, concentrate on
the richness and subtlety of color that is released and accentuated by the
soft lighting. For interiors use tripods and existing light where possible,
soften the lighting by using bounce flash where it is not.
- Get the angle. Move
away from the standard eye-level point of view. Get down on the ground, get
on your knees, lay down, get
down to children’s eye level, get a puppy’s point of view, get up and
elevated, get over people’s shoulders. In short, create an image that is
different than the standard view.
- Get small. The small
details of a place or event often tell the story in a way and scale that is
more approachable and understandable. Keep your eyes open for the small
things, the everyday objects, the human scale things that make your story
compelling.
- Capture the peak of the action. In any
activity, movement or sports shot, capture the moment of highest drama,
stress or effort. This requires anticipation and the ability to time your
shutter release with the precise moment required.
- Use leading lines. Use
leading lines to draw the viewer’s eye into the subject.
- Use patterns. Use
patterns to define the creative space of the image and accentuate the
difference of the subject.
- Use light levels. The
human eye is drawn to exceptions and brightness. Ensure your subject has a
higher light level than everything else in the frame or is accentuated by
exception.
- Use selective focus.
Isolate your subject by making it the only thing tack sharp in the frame.
Use aperture priority mode to control depth of field. Use shutter priority
mode and panning to make your moving subject the only thing in focus in a
moving background.
- Create emotion.
Successful photographs create, invoke or spark emotion in the viewer.
Wonder, fear, excitement, anticipation, awe, trepidation, tension, comfort,
contentment, etc., your image must create an emotion to be successful.
- Tell a story. Each
photograph you create should be able to stand on its own, tell its own
story, without the luxury of a caption. As you look through the viewfinder
or at the view screen, ask yourself “what story is this image telling?”
- Capture the
establishing shot. Shoot overall scenes, the exterior of buildings, signs
and markers that describe the subject and place your photographs in the
context of locations and events.
- Establish the context.
Shoot signs, calendars, newspapers, notes, etc. that will establish the
context of the images you are shooting. These images will greatly aid the
process of cataloging the images now and understanding where and when they
were created at a later date.
- Understand the
different types of travel photography.
- Travel Photography.
This type of photography is the domain of professionals. A professional
shooter will invest as much time, money and resources as are required to
create the image. This means they can and will bring to bear resources
that are unavailable to an amateur, including professional models,
costumes, rented props, etc. A professional will alter or modify
anything required to create the shot they need. A professional shooter
will wait as long as it takes to get the shot, if that means three weeks
for just the right clouds at sunrise, so be it. Travel photography is
defined by the attribute that if an aspect of the shot is possible to be
controlled, it will be, as many times as it takes to get the shot. Travel photography is
commercial photography applied to the travel marketplace.
- Traveling
Photography. This type of photography is primarily the domain of
amateurs. This type of photography relies on creating images from what
is there at the time you experience it. There are no professional
models, no props, no staging, no re-arranging things or re-running the
scenario as many times as it takes to create the image. It is completely
unfair to compare the random and moment-by-moment endless change of
reality that the traveling photographer works in to the staged,
controlled and reproducible environment that a travel photographer works
in. Traveling photography is photojournalism applied to the travel
experience.
- Understand the
different types of images you create.
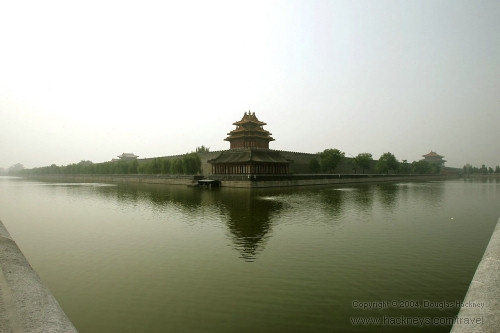
- Record shots. These
are an overall view of the castle, city, place, thing, etc. It will look
like a postcard image. Its purpose is to establish the record that you
were there or record the status or existence of a place, person or
object.
- Grab shots. These
are images you create by grabbing and shooting. You may or may not
capture the quickly passing event, object or person in the fleeting
moment.
- Controlled shots.
These are images you create when you control the setting, subject, time
and place. Other than a structured still life these are very rare in
traveling photography.
- Experimental shots.
These are images you create while exploring the capabilities of your
tools.
- Creative shots.
These are images you create by applying your creativity and vision to
the world that you encounter. Your creativity is primarily limited by
your knowledge of your tools. If you fully know what your
tools (camera, lens, lighting, etc.) are capable of, then your results
will only be limited by your imagination, inspiration and freedom of
thought.
|
|
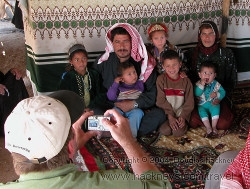
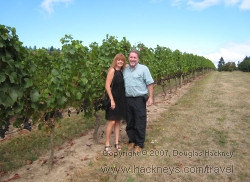
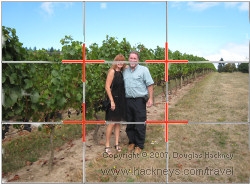
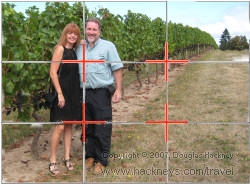
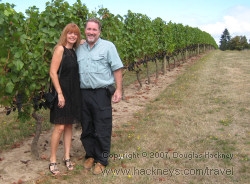
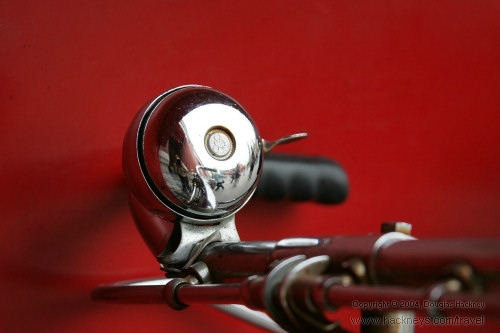
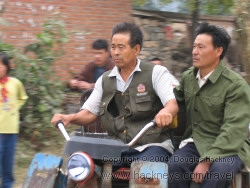
Understand how priority
modes work. This shot used aperture priority with fill flash. |
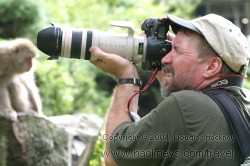
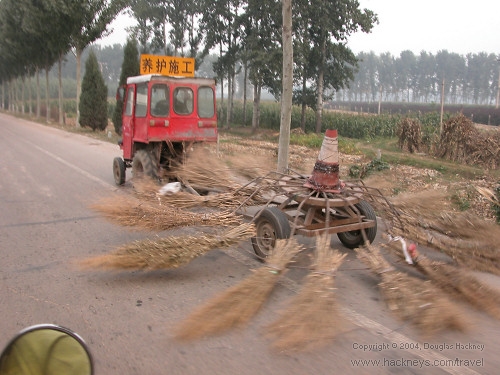
Use panning to isolate your
subject against the background. |
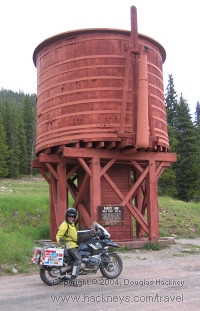
|
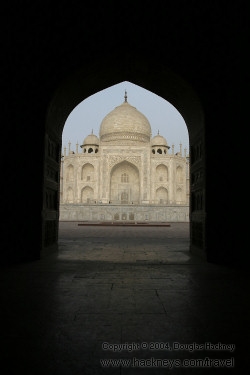
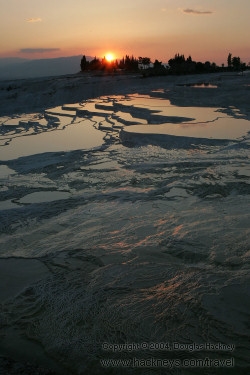
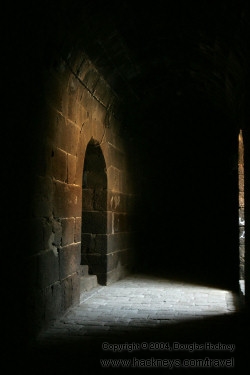
Seek different angles for
common scenes. |

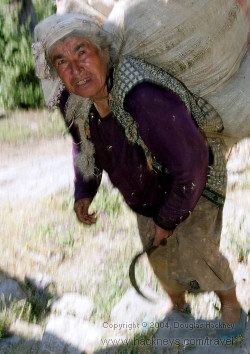
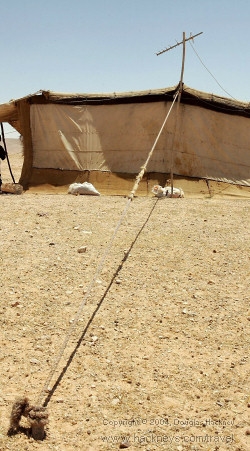
Use details to enrich the story. |
|

Freeze the peak of action. |
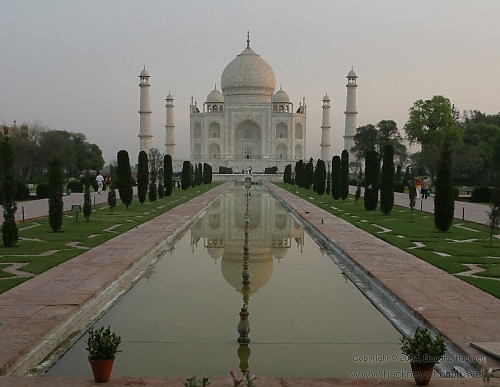
Use leading lines to draw
the viewer's eye to the subject. |
|

Use patterns to define the
creative space. |

Use light to draw the eye to
your subject. |
|

Use focus and depth of field
to isolate your subject. |

Create emotion and tell a
story in every shot. |
|